Uploading Your DRC Files
The File Uploader allows you to manually import your DRC assessment file into TKG Analytics.
Manual uploads do not process automatically, but you’ll receive an email confirmation immediately after uploading. The TKG Analytics team will process your files and notify you once updates are complete.
Your district’s assessments follow a fixed per-year shape - at most four benchmark, four district, and one state assessment; see Assessment Types and Per-Year Limits.
Accessing the File Uploader
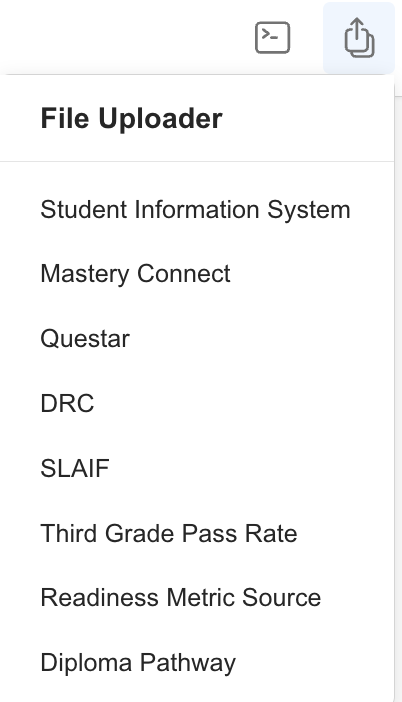
You can access the File Uploader from anywhere in TKG Analytics by finding the File Upload icon on the top navigation bar:
- Click the File Upload icon in the navbar.
- Select the type of files you want to upload from the dropdown menu.
Only District Admins have permission to upload user files. If you do not see this option, contact your district administrator for access.
Upload Requirements
Before uploading, make sure your files meet the following:
| File Type | File Types Allowed | Max File Size Allowed |
|---|---|---|
| DRC | csv, xlsx, xls | 25 MB |
The file must be the original download from the vendor and remain untouched (no edits or changes).
Step-by-Step: DRC File Upload
-
Open the File Uploader
Navigate to the file uploader screen using the method above. -
Check the Assessment
There is no year to pick. The form shows Uploading for: with your district's state assessment for the current school year and its year. Double-check that it matches the assessment data in your file. If your district has no state assessment set up for the year, the form says so instead; open a Helpdesk Ticket and we will add it. -
Drag Your File(s) The form has two upload areas. Drag and drop your
.csv,.xlsx, or.xlsfiles into the one that matches:- MAAP / EOC files: grade 3-8 MAAP, EOC, and other standard DRC score files.
- MAAP-Alternate: DRC MAAP-A (alternate assessment) files. Keep them out of the MAAP / EOC area; they are filed separately.
A popup covers the page while each file uploads; keep the page open until it closes.
Do not rename a file to change its type
If your file is a legacy
.xls, upload it as it is. Renaming it to.xlsxdoes not convert it, and the file will not be read. If you do need to convert one, open it in Excel and use Save As to save a real.xlsx. -
Verify File Names and Sizes
Ensure each file:- Matches the allowed file type.
- Is smaller than 25 MB.
-
Repeat for All Required Files
You can upload multiple files before finishing. Ensure every file is for the assessment shown under Uploading for:. -
Click
Finish
This step saves your uploads to the system. -
Receive Confirmation Email
After uploading, you’ll receive an email confirming your submission.
The confirmation email is sent to the user who performed the upload. You’ll receive an email after uploading that includes your name, district, data type, and the exact upload time.
Troubleshooting
- File Rejected: Check that the file meets the upload requirements and hasn’t been edited.
- Wrong Data Displaying: Verify the assessment shown under Uploading for: matched your files, and that MAAP-A files went into the MAAP-Alternate area.
- Didn’t Receive a Confirmation Email? Check your spam or junk folder first. If you still don’t see it, please open a Helpdesk Ticket.
- Missing Upload Button: Try refreshing the page or clearing your browser cache.
Need Help?
- Helpdesk Ticket: Helpdesk Ticket
- Website: https://tkganalytics.org