Uploading Your ELS Assessment Files
The File Uploader allows you to manually import your assessment files from ELS into TKG Analytics.
Your scores import once the upload is accepted, and you’ll receive an email confirmation immediately after uploading. A few minutes later, the import status email tells you what happened to every file. Reports built from those scores are updated by the TKG Analytics team, who notify you once they are complete.
Your district’s assessments follow a fixed per-year shape - at most four benchmark, four district, and one state assessment; see Assessment Types and Per-Year Limits.
Accessing the File Uploader
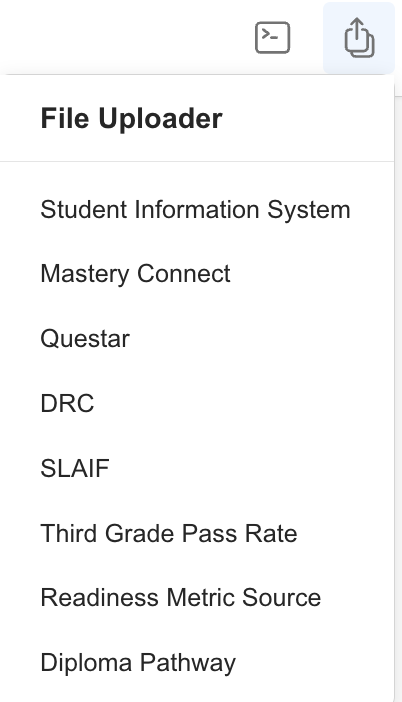
You can access the File Uploader from anywhere in TKG Analytics by finding the File Upload icon on the top navigation bar:
- Click the File Upload icon in the navbar.
- Select the type of files you want to upload from the dropdown menu.
Only District Admins have permission to upload user files. If you do not see this option, contact your district administrator for access.
Upload Requirements
Before uploading, make sure your files meet the following:
| File Type | File Types Allowed | Max File Size Allowed |
|---|---|---|
| ELS | xlsx | 25 MB |
The file must be the original download from the vendor and remain untouched (no edits or changes).
Required Headers
When preparing your file, be sure it includes the following headers:
| MSIS # | Student Name | Date | Teacher | Pts. Obt. | % Corr | PL | Growth | Sugg. Grade |
|---|---|---|---|---|---|---|---|---|
Example File: You can download an Example ELS Export Excel File to see the correct format.
Algebra I Benchmarks (compacted 8th graders)
If your district has compacted 8th graders taking Algebra I, their Algebra I results come in a separate ELS export from on-grade 8th grade math. Both files are needed.
TKG Analytics identifies an Algebra I export from the subject label inside the file (ELS labels Algebra I benchmarks as Math-A1). That label is what keeps a compacted student's Algebra I and on-grade math scores from colliding.
Because the Algebra I label is read from inside the file, the export must be the original, unedited download. If the subject label is changed or removed, the two sets of scores collide and only one is kept.
Student ID Column
ELS exports include a single MSIS # column. Our importer uses this column to match scores to students in your district roster.
Before uploading, take a quick look at the MSIS # column to confirm it's populated for every row with the state-issued MSIS ID. ELS exports occasionally have blank or partial values here — when that happens, those scores can't match a student and won't appear in your dashboards.
If you spot blanks or unexpected values, you have two options:
- Edit the file to fill in the correct MSIS ID for affected rows, then save and upload.
- Reach out to your ELS representative to correct the source data, then re-export.
How Each Column Is Used
What TKG Analytics reads from an ELS export depends on your district's Calculation Type.
| Column | Vendor Defined | K-1 District Defined | District Defined |
|---|---|---|---|
MSIS # or Student ID |
Required. Matches the score to a student on your roster. | Required. Matches the score to a student on your roster. | Required. Matches the score to a student on your roster. |
% Corr |
Required, but not used to score. | Kindergarten and grade 1: scored against your K-1 ranges. Grades 2 and up: required, but not used to score. | Required. Scored against your district's cut scores. |
PL |
Sets the student's performance level at every grade. | Sets the performance level for grades 2 and up. Not used for kindergarten and grade 1. | Not used. |
| Subject label | Required. Read from inside the file, above the header row. It starts ELA-, Math-, Sci- or SS-USH. |
Required. Read from inside the file, above the header row. | Required. Read from inside the file, above the header row. |
The other columns in the export (Student Name, Date, Teacher, Pts. Obt., Growth, Sugg. Grade) are not read.
Where PL sets the level, each value must be one of your subject's levels:
| Subject | Accepted levels |
|---|---|
| English and math | 1a, 1b, 2a, 2b, 3a, 3b, 4, 5 |
| Science and U.S. History | 1, 2, 3, 4, 5 |
| Any subject, kindergarten to grade 2 | 1a, 1b, 2a, 2b, 3a, 3b, 4, 5 |
Capital letters, spaces around the value, and a trailing .0 do not matter, so 3A and 4.0 are read as 3a and 4.
Midterm files are different: you confirm their columns when you upload them. See the District Assessment Walkthrough.
What Happens to a Row That Cannot Be Scored
- A row with no
MSIS #is not a student, such as a totals line, and is skipped. - A row with no
% Corris not imported. - Where
PLsets the level, a row whosePLis blank, or is not one of the accepted levels above, is not imported. - A student who is not on your roster, or has no enrollment in that subject for the assessment's period, is not imported.
- If the student already has a score for this assessment, a row that is not imported leaves that score as it was.
The rows that are not imported are counted by reason, and the TKG Analytics team can see them.
When an Upload Is Turned Down
Every file is checked before anything is saved, and every problem is listed in a popup titled Your upload was not saved, one per line. An upload is turned down, with nothing saved, when a file is not an .xlsx, is over 25 MB, cannot be read, has no student ID, % Corr or subject we can find, has no student on your roster, has no scores, or, where PL sets the level, has no PL value we can read. See What TKG Analytics Requires Before an Upload for each message and what clears it.
Step-by-Step: Retrieve the Correct ELS Export File
-
Log into ELS Navigate to ELS and log in.
-
From your homepage, click on Pathways to Proficiency.
-
In the Grow box, there is an Analysis & Review dropdown. Click on the dropdown and select Test Reports.
-
Using the search bar, search for the district benchmark.
-
Once you have the district benchmark, press the blue graph button to the left of the assessment name.
-
You will be redirected to a new screen — make sure the dropdown has All Schools selected.
-
On the left-hand side, there is a Student Level dropdown. Click on Student Level and then select Student Results.
-
Once you select Student Results, an option bar will appear above your student data. Press the Excel button and download the file.
-
Name the file using the grade level, subject, and assessment (for example, Grade 3 Reading Benchmark 1).
-
Repeat steps 1–9 for all applicable benchmark assessments.
Step-by-Step: ELS File Upload into TKG Analytics
-
Open the File Uploader
Navigate to the file uploader screen using the method above. -
Select ELS from the dropdown menu.
-
Choose the Assessment
Pick the benchmark from the Assessment list, for example Benchmark 1 for the current school year. The upload area appears once you have chosen one. Double-check it, as it decides where your scores are filed. -
Select or Drag Your Files
- Drag and drop your
.xlsxfiles into the upload area. A popup covers the page while each file uploads; keep the page open until it closes.
- Drag and drop your
-
Verify File Names and Sizes
Ensure each file:- Matches the allowed file type.
- Is smaller than 25 MB.
-
Repeat for All Required Files
You can upload multiple files before finishing. Ensure the files are from the same year and benchmark. -
Click
Finish
This step saves your uploads to the system. Finish becomes available once you have added at least one file and, if your roster is out of date, ticked the box confirming you understand. -
Receive Confirmation Email
After uploading, you’ll receive an email confirming your submission. -
Your Scores Import
Scores import once the upload is accepted, with nothing more for you to do. If you add more files for the same assessment later, they import too, and a student already imported keeps one score.
The confirmation email is sent to the user who performed the upload. You’ll receive an email after uploading that includes your name, district, data type, and the exact upload time.
Troubleshooting
- File Rejected: The popup names each file and what is wrong with it. See When an Upload Is Turned Down.
- Wrong Data Displaying: Verify you selected the correct year and benchmark during upload.
- Didn’t Receive a Confirmation Email? Check your spam or junk folder first. If you still don’t see it, please open a Helpdesk Ticket.
- Missing Upload Button: Try refreshing the page or clearing your browser cache.
Need Help?
- Helpdesk Ticket: Helpdesk Ticket
- Website: https://tkganalytics.org